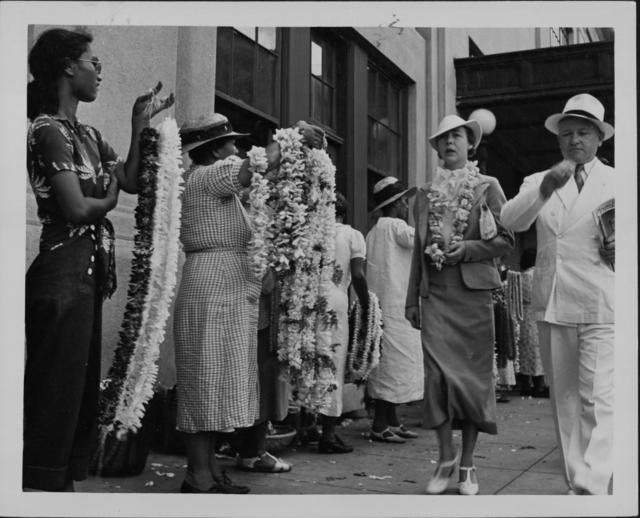
Lei was introduced to Hawai‘i by early Polynesian Voyagers from Tahiti. With the arrival of visitors, the lei quickly became a symbol of the aloha spirit to many travelers. During the “Boat Days” era, lei vendors would line the pier at Aloha Tower to welcome visitors arriving by ship. On departure, visitors and locals would throw their lei into the water in hopes of returning to the islands one day.

Lei Sellers Honolulu 1935 Pan-Pacific Bureau
In Hawai‘i, lei are worn by anyone at any time, you don’t need a reason. When there is a big celebration, like a wedding or a graduation, it is customary for family members to make lei for their loved ones. This often leads into a large family gathering with shared stories and bonding.
A lei can be made from various materials found right in your backyard. The most common lei to make is a string lei consisting of fresh flowers. Below are supplies and instructions for making a string lei.

Puakenikeni Flower
SUPPLIES
-
(40-50) medium sized flower blooms. Depending on the type of flower, you may want to remove the stem. If the stem loosens the flower (makes it come apart), then its ok to leave it on.
-
Lei needle (you can find these at any craft store, craft section of a general merchandise store, or online).
-
Scissors.
-
Cotton string, thread, or fishing line.


STEP BY STEP INSTRUCTIONS
-
Take the end of the string by your fingertips and measure it along the length of your arm, across your chest, to the opposite shoulder and cut.
-
Thread the string through the eye of the needle and double the top over just about 2-inches. This is the slack that you will use to tie the ends together when you are done.
-
Tie a knot at the open end, leaving a little extra to tie the lei together. The knot will act as a stopper for the flowers, so they do not fall off the ends.
-
Take a flower bloom and insert the needle from the “butt” end of the flower through the top and pull the flower through to the end of the string where your knot is. Be very gentle when stringing the flowers as some can be more fragile than others.
-
Take your next bloom and do the same as the previous step except when you get to where the first flower is, you’ll want to place the “butt” of new bloom into the top of the first. Make sure they are lined up nicely, all petals facing the same direction.
-
Continue to string the blooms until the lei is to your desired length.
-
Standing straight up, hold the lei with the loose end (the end with the needle) at the top and make sure all the flowers are placed nicely and spaced evenly.
-
Tie the ends together making sure that the very first bloom you threaded ends up inside of the top of the last bloom. Tie the ends into a knot and there you have a fresh flower lei!
Photos courtesy Ānuenue Punua and her ‘ohana.
